Winter Doldrums…

WELL!! It’s been quite some time since I’ve done an update on here and the primary reason for that is… well… nothing has been really happening. Seriously… I could tell you all about the minutia of my daily life. Getting up, having breakfast, going to work, having dinner, going to bed… but it’s boring enough at times living it, let alone trying to make it sound interesting to you guys… but the reality is, both Shannon and I have been working like crazy and nursing Thing 1, Thing 2, and Thing 3 back to health as they’ve all been sick with colds and obnoxious.

… keeping our sanity of late has been tricky.

With the MLK Jr. holiday today, I had a day off, and a chance to sit down and put together an update.

The past few days weather have been unseasonably cold for Oregon in the winter. We’re on what feels like our 12th consecutive day of below freezing temperatures and freezing fog and It’s been hovering between 28 and 32 degrees for almost a fortnight, with a periodic increase to 37 or 38 degrees, but even those days are few and far between. In the decade or so that I’ve been in Oregon, this seems like the coldest its been for an extended period of time – at least that I can remember.

I know some of you will read this and chuckle to yourself, because in your world, winter is 0 degrees and below. Turns out in Oregon, we’re not much different than Southern California sometimes when it comes to whining about cold weather. Just see the recent Jimmy Kimmel video about Southern California’s weather issues for an example… (http://www.youtube.com/watch?v=_6t-EjrtD3U) That’s what it sometimes feels like in Oregon… We get a dusting of snow and our whole world shuts down (as a teacher, don’t get me wrong – I’m not necessarily complaining… but it is humerous nonetheless)

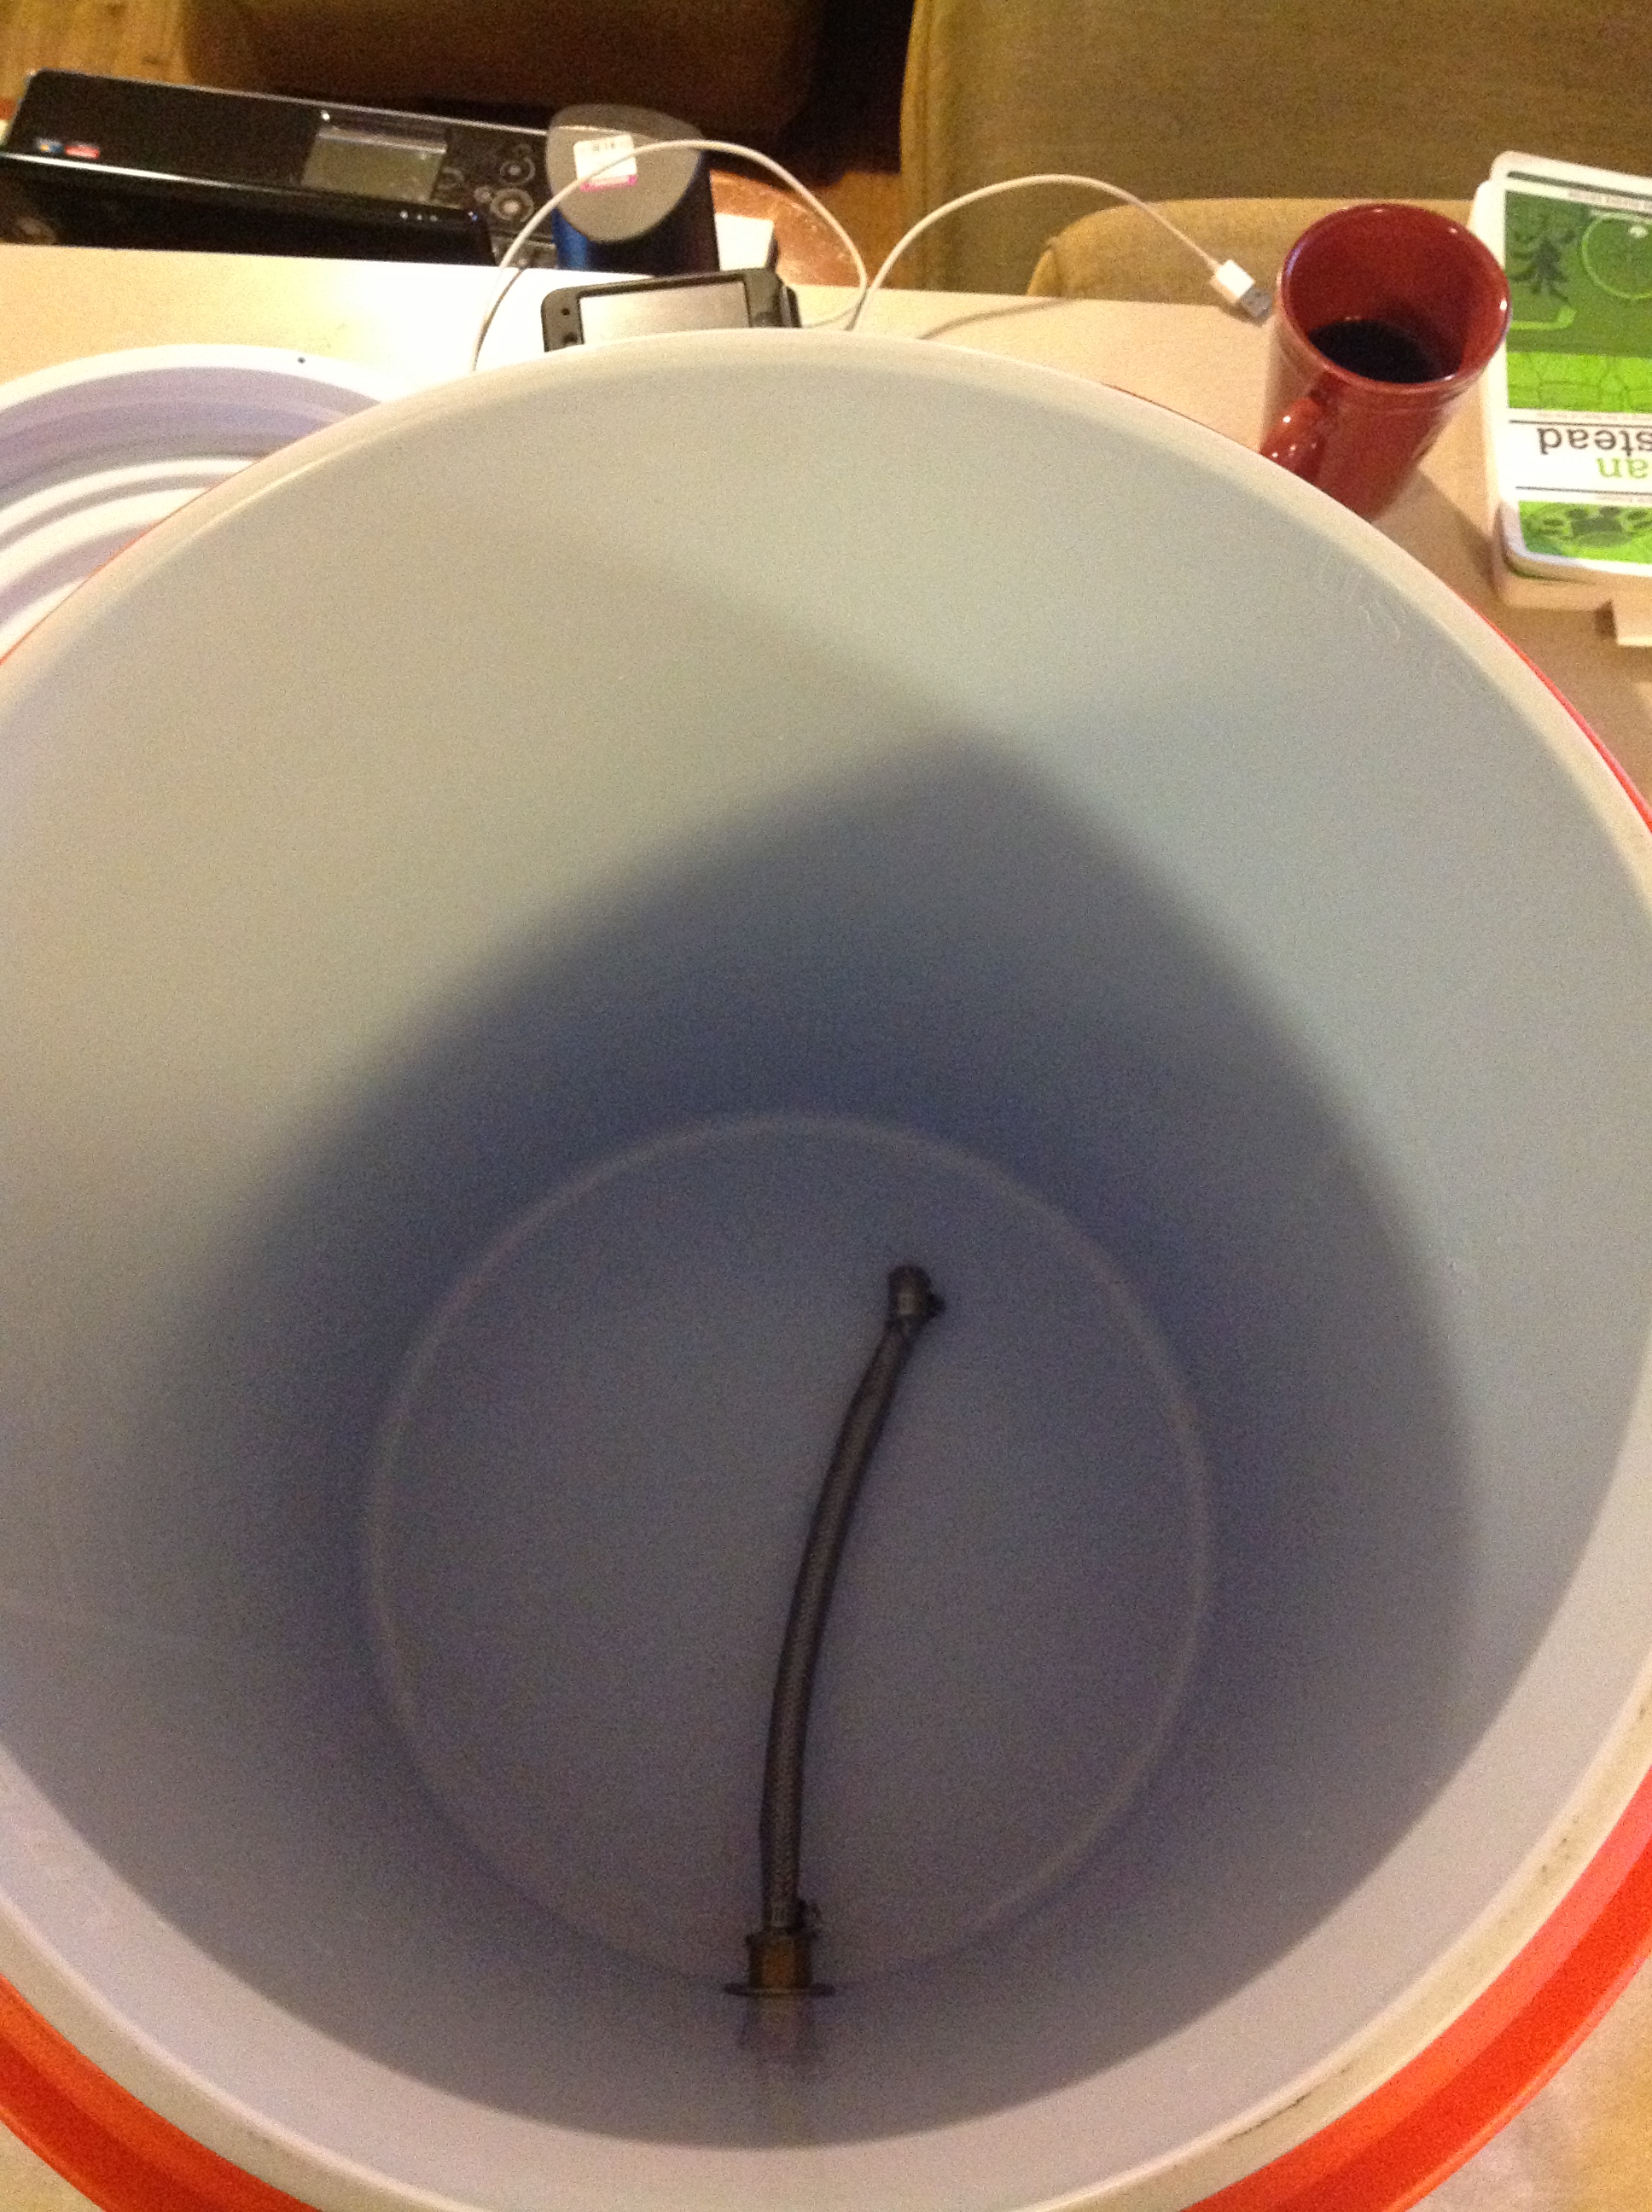
Growing up in Spokane, this kind of weather was fairly standard, with much of the winter spent significantly colder, and I don’t remember what we did there during the winter. I lean in the direction of nothing… which is about what we’ve gotten done here in the last week. I’m definitely excited for things to warm up a bit so we can get back at the outdoor projects, and get to checking some things off. The chicken house is pretty well stalled out at this point, and the yard can wait – the ground is frozen solid; the lager is well… lagering in secondary. (actually, if we want to get technical, it’s in the midst of its diacetyl rest before lagering) I bottled some wine yesterday that we had made from some Concord Grapes we got from a friend, and I’m in the process of brewing a Stout today. Well.. I will be as soon as finish this and figure out the mechanics of the protein rest, I’ll be starting that this afternoon.

Shannon has been experimenting a bit in the kitchen, and we’ve had some successes, and a couple of “wait and see’s” that are worth sharing.

First, a huge success. Colcannon.. perhaps you’ve heard of this before, perhaps you haven’t, but this recipe was obtained from Mother Earth Living, and is unreal. It also happens to be another really good way to eat kale.

I had never heard of this stuff, but it turns out Colcannon is a traditional Scots-Irish dish that consists of primarily potatoes and greens like Kale all mashed together. It’s a fairly simple dish, (tasty enough to inspire a song) and its typically made during the autumn and winter when the Kale was harvested. It is nourishing as well as filling, but most importantly, with the sweet potatoes, leeks and orange zest – this particular version is absolutely delectable.

Image

Sweet Potato Colcannon

Ingredients:

-3 very large or 4 medium Sweet Potatoes
-2 Medium Leeks
-1 Bunch Kale
-3 Tablespoons Olive Oil
-Zest of 1/2 Orange
-1 or 2 teaspoons ground black pepper
-2 Tablespoons sweet cream butter

Directions:

Boil a large pot of water. Peel Sweet Potatoes if desired. Cut potatoes into 1 inch cubes. Set Aside. Trim bottom 1/4 inch and top 2 inches from leeks. Slice each in half lengthwise and soak in a bowl of water, swishing to remove sand and grit. Repeat with clean water if leaks are gritty. Dry leeks, then cop into 1/4 inch half-moons. Rise greens, shake to dry and tear each leaf from thickest part of stem (discard stems). Gather leaves, roll like a cigar and chop roughly.

Place sweet potatoes in boiling water, and boil for about 15 minutes. Place olive oil in a large frying pan on medium heat. Add leeks and stir regularly for 3-4 minutes until they begin to soften. Add greens and continue to stir until wilted, no more than 5 minutes. Remove from heat and set aside. Cut largest potato chunk in half. If center is hard, cook for another 2-3 minutes. When soft to center, drain and return to pot. Add orange zest, salt, pepper and butter. Mash with a handheld potato masher or large fork until you reach desired texture.

Add greens and leeks, stir and adjust seasonings to taste. This can be made a day ahead and heated in a covered casserole dish.

Secondly, a “Wait and See”.

Image

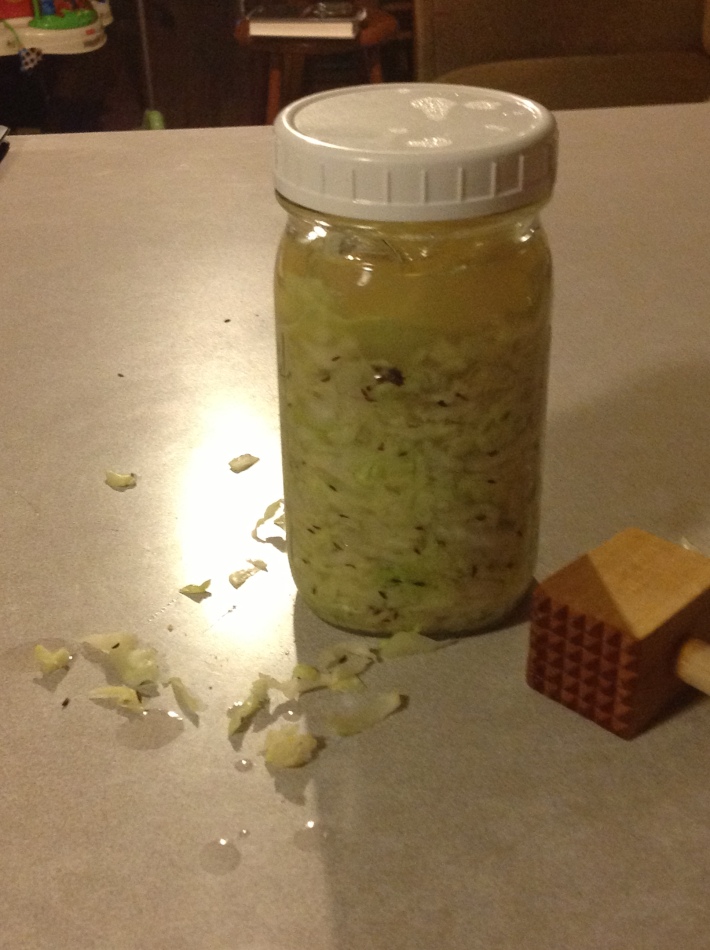
We’ve been reading a lot about lacto-fermentation, so we thought we’d give it a shot. We started simple, at least I think we did. We started with some cabbage in an attempt to make some sauerkraut, and the jury is still out on it. We’re not super familiar with lacto-fermentation, but it doesn’t taste like sauerkraut to me. It’s really salty, and I’m not sure that we’re fans of the caraway seeds. So for those of you who have done more lacto-fermentation than us… is this normal? Should it be all sauerkraut-y? Or more wilted and salty? We’re going to let it sit a bit longer in the fridge fermenting to see if that makes the difference since we tried it pretty early, but suggestions are greatly appreciated.

With that, I’m going to wrap it up. I have some beer to make. Hope you’re all finding more to do on the home front than we are – soon the weather will warm and we can take care of the projects – until then… we plan and get ready for when it finally does.

Brewing up Trouble…

WOODY: What’s the story, Mr. Peterson?
NORM: The Bobbsey twins go to the brewery… Let’s cut to the happy ending.

Well, today there weren’t any Bobbsey twins, and Norm was only here in spirit, but my kitchen became a brewery today for the first time in a lot of years…

Flashback to the Light Family — B.C. (Before Children)

Ben and Shannon had a life. We regularly made beer and wine, we served it to our friends when they came to our home – we gave bottles away as gifts. We were hip, like hipper than hipsters in hip huggers hip… (Ok. Not true – we were pretty much squares) Then we had kids… now we drink constantly — we just can’t brew it fast enough. (kidding… but no, seriously…)

Shannon has been after me to dig out the equipment and get back after it, and after running through my equipment and making a trip to the local homebrew shop to pick up some of the needed supplies we were off to the races.

Shannon is a cheap date. I mean that in the nicest way possible.

In this beervana that is the Pacific Northwest, when we go out to a restaurant and she orders beer, she orders… *drumroll please…* Miller High Life, or a North American Lager of some variety, Bud, Coors, etc… Out of all the available microbrews in this state, Widmer, Bridgeport, Deschutes, Full Sail, Ram, Seven Brides, the laundry list goes on — nope… bottle of .99 cent malted water.

So this brew was tackled with two very crucial things in mind.

1) A happy wife makes for a happy husband.

2) Anything Anheiser-Busch/Miller/American Beers can do, I can do better. (I hope, or else I’m in serious trouble)

This is as good a spot as any to put the TL;DR.

I have several friends who I know once this gets started are going to hear me start talking about brewing, and I’ll be able to hear the snores from my house. It’s actually a game we play, when one of us starts geeking about something we love, everyone else loudly snores until they stop.

So, for those of you that don’t care at all for brewing… or anything related to brewing… here’s the TL;DR.

I made beer. Yay.

The process of this ‘Praying-its-Better-Than-Bud’ North American Lager began Saturday evening with a yeast starter. I used some dry malt extract and water to make a nice bit of light wort which would make an excellent home for my wee yeasties. Popped the Wyeast Smack Pack (Pilsen Lager – 2007) and pitched to start the yeast.

Kept them at a constant 70-75 for the first little bit, and they went ballistic. The picture below is the starter after it had been adjusted down to 60-65, closer to their regular fermentation temperature.  (note the awesome book by Kelly Coyne and Erik Knutzen – The Urban Homestead – very good read – I highly recommend it.)

IMG_0427

I had planned on brewing Sunday, and realized that I had grossly miscalculated my equipment – realizing that my old Mashtun had been used for 1/2 a dozen things in the years since I had brewed last, so we’d need a new Mashtun/Lautering Tun. I did some looking around online, and found a really cool design that I decided was the one I wanted. Headed to Home Depot to pick up some parts, and got it going. Saved me a lot of work from my old rectangular one. It’s all brass and metal fittings with an easy to operate ball valve on the opening, down to a 3/8 inch hose barb. Runs 1/2 OD silicone tubing like a champ. So I spent Sunday tracking down parts, building the mashtun/testing/proofing it, and repairing my propane burner.

IMG_0428 IMG_0429 IMG_0430

The stainless steel braid is the best pieces of this entire design! Straining the mash used to be a headache. You’d burn yourself, couldn’t get it all out, etc… this made it so much easier. It’s a piece of Stainless Steel supply line for a toilet. Ends clipped off, vinyl tube inside pushed out. The braid filters the mash, and lets the wort run through the valve. Brilliant design – limits you to batch sparging, but that’s fine – that’s my standard anyway.

IMG_0431

Grains ready to become beer – 5 lbs of 2 row barley, and 2 lbs of flaked rice (will be a Budweiser style pilsen lager when its done as they use a lot of rice)

IMG_0433

A shot of the mash inside the Mashtun, (Looks just like hot cereal) once the water was heated to 170 degrees, I put the water into the preheated Mashtun, then put the grains inside – they absorbed about 10-12 degrees, which put me right in the money range of 158 degrees. This is the temperature that the mash needs to sit at for 45 minutes to an hour to get the majority of the fermentable sugars from the grain.

Batch sparging with 180 degree water brought me to the 6 gallons needed for the primary boil. Here’s the sparging process, flushing the grains with hot water to wash the sugars into the boil kettle down below.

IMG_0434

Outside we go – 6 gallons of wort in the kettle, propane burner working hard to heat it to boiling. Decent color – once it boiled down to 5 gallons and concentrated better, it came out to a very nice golden yellow color. The color in the spoon is a bit deceiving.

IMG_0435

With the kettle boiling finally, it was time to add the hops. This is probably my favorite part of the process – it really starts smelling like beer once you pitch the hops. I used Crystal hops for this particular brew. They’re a clean, crisp, somewhat spicy hop. I pitched hops twice.

First, 1 ounce at the beginning of the boil for the full 60 minute boil in order to bitter the beer.
Second, .75 ounces with 15 minutes to go to give it some of the spicy aroma. (I like hops in my beer – Bud simply doesn’t have hops in the profile – I decided to fix that.)

IMG_0436

Happy hops floating in their little beer Jacuzzi.

The next sets of steps happened so quickly I wasn’t able to get photos – once the boil is nearing completion, there is a bunch of stuff to do. Sanitizing equipment for the final push, getting everything ready to go so when it is done, it all has to happen quickly.

Also with 15 minutes to go, I added Irish moss to help clear out the proteins that cause chill haze later on. I also put the wort chiller (a contraption of copper tubing that attaches to a garden hose to circulate cold water and exchange heat) in order to quickly chill the wort to temperatures I can pitch the yeast at… < 80 degrees Fahrenheit.

All of this has to be done fast, and it as to be done sanitary. At this point, any contamination can ruin the beer. Needless to say, the camera didn’t come out. I chilled the beer down to 74 degrees, pitched the yeast and placed it in the garage to slowly cool down to the lager fermentation temperatures of 48-56 degrees.

Specific gravity reading came out to 1.043 (higher than the recipe predicted in BeerSmith) and the wort itself tasted very sweet, the hop bitters were present. It has a lot of potential. The bottom picture is the beer sitting in the garage in the primary fermenter with airlock (you can see the color – nice and golden).

IMG_0437

Total yield at the end was 4.5 gallons of workable beer – from a 6 gallon starting amount. I haven’t yet begun to calculate efficiencies… there will be time for that. Gotta let the fermentation process take hold, and once it does – I will have 4.5 gallons of delicious “Happy Wife Lager”. Finished off the day with some smoked Steelhead from the other day (which by the way, the Molasses brown sugar substitute I mentioned earlier worked PERFECTLY – very good) .

The process is a kick, I had forgotten how fun it is and I’m already planning the next one. I’m thinking a Breakfast Stout…. It will have all the best stuff for breakfast — Chocolate, Coffee, Oatmeal, and well… Stout.

Till then, Prost.
Ben